Monday, December 28, 2009

Steve McCurry's blog - some interesting thoughts for a new photographer. . . and a little more

Not only will you get some good advise but you'll see some beautiful images, here.

In some other news, Rick Sammon is coming out with another book, "Confessions of a Compact Camera Shooter". You can see this and more at his blog site.
I haven't seen this one but his approach to learning is always informative and fun. Check it out.

I'm almost finished with my "basic" HDR tutorial. I should be able to post it right after the first of the year.

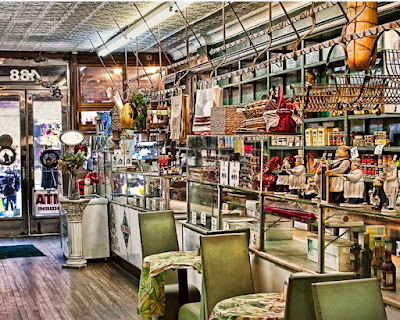
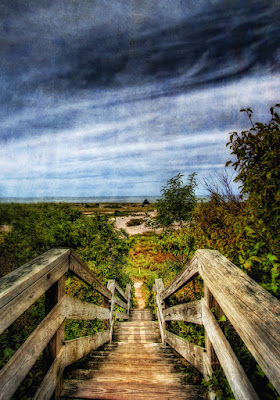
The above image was finish in photoshop using Color Efex Pro filters. Tonal Contrast is my one of my favorites. I strongly suggest you give it a try.

Wednesday, December 23, 2009

Happy Holidays

This is just a short post to wish one and all of my readers a very

Merry Christmas


Monday, December 21, 2009

NIK software announces Viveza 2


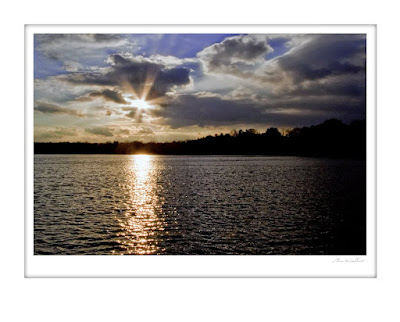
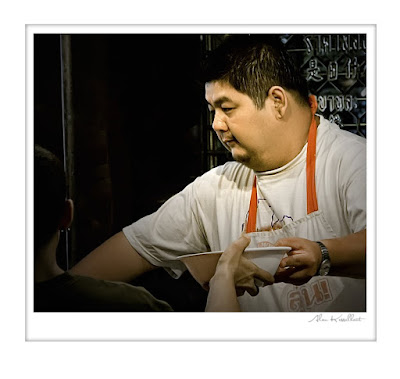
Viveza has been one of the best Photoshop plug ins I know. I use it on most, if not all, of my pictures. As with Viveza, Viveza 2 uses "upoint" technology that makes processing your images fast and simple. "upoint" means exactly what it says, you point, click and slide. That's it. They have introduced some additional sliders to make processing even easier. Can you do the same adjustments in ps, of course, but with Viveza there are no complicated selections or layers. The learning curve is extremely short. I processed the above photography with just a few clicks.

Take a look at their site, here . They have a free 15 day trial offer as well as some interesting videos explaining Viveza in more detail.

While there take a look at the other programs in their product line. I'll be talking about some of the them in the next few days.

Friday, December 18, 2009

The war continues and the battle lines are forming.


Do me a big favor, read this on Scott Kelby's blog. But don't stop at the article by Trey Ratcliff. You have to read the comments. By the way, I think it's wonderful that this whole subject is causing such an uproar. It makes us think about our own vision. Trey wasn't even talking about HDR. That's how influential he has become. Interesting.

Wednesday, December 16, 2009

The HDR wars


Either you love it or you hate it. What side are you on? Here's were I stand.

First a little history. From time to time I check in on David Ziser's blog. David is an excellent wedding photographer. I don't shoot weddings, but his approach and hints on lighting and general photography are wonderful. I highly recommend his blog. Well anyway, one day he suggests that his blog readers should check in on this Trey Ratcliff guy. I did and when I saw the above image I said for all to hear "I have to learn how to do this". (Click on it to see a larger version.) And that's what I did and I'm continuing to study his technique.

I believe that it's important to know as much as I can about a subject I love. I love photography. I shoot digital images. I process them in lightroom and photoshop. In both, I use plug-in programs. I experiment with all of these. I take courses online at Kelby Training, I belong to NAPP and look at their tutorials, I follow Matt Klaskowski's "Lightroom Killer Tips" all this among other blogs, books and DVD tutorials from Vincent Versace and John Paul Caponigro. Do I use every tip or trick. No, but my goal is to know that they're available if I need them. I believe that the more I know about what I can do in the digital darkroom the better my capture will be and then the better the final print will be.

I'm doing the same with HDR. Do I like all the hdr images I see. Again, no. However I want to know as much as I can about how they were shot and processed. Once I know how that all happens I can concentrate on the "WHY" I should or should not use it.

I went to the Princeton University Art Museum last year to see a exhibit of Ansel Adam's prints. The exhibit turned out to be about one subject, his famous "Moonrise". It was very interesting to see the 15 or 20 print variations of the same subject. They were all printed using different techniques. To my eye some were really good and some were just awful, with others running the whole gammet.

This all goes back to my own pictures. The one I see through the lens, the one my camera's sensor captures and the one that I process in the digital darkroom. Or should I say, the multiple pictures that come out of my digital darkroom. Some are really good and some are just awful.

Whether really good or just awful, shouldn't one of those be High Dynamic Range. I think so.


Tuesday, December 15, 2009

A World in HDR (Voices That Matter) On sale now

Last night my wife and I, along with some friends, went to Trey Ratcliff's "A World in HDR" book signing in New York City. It was a first class event and I enjoyed meeting Trey, his wife Tina and his close friend Will. I follow Trey's blog stuckincustoms every day and have listened to his on air interviews and watched his tutorial so it was like connecting with a friend. He had a few images printed on aluminium for us to look at and a slide show on a large flat screen TV. After just hanging out for a while he gave a short, but very informative talk, about HDR and the future of the process. He's just a down to earth nice guy with enormous talent. My copy, along with a numbered print is in the mail. I promise a review soon, but after looking quickly through a sample copy last night I know we're all going to love it. You can order the book here.

The following is information supplied by the publisher, Peachpit Press.

High dynamic range (HDR) photography lets you capture the myriad colors and levels of light that you can see in the real world, and the results are amazing photographs that run the gamut from super real to surreal. Explore this fantastic realm of photography through the unique vision of renowned travel photographer Trey Ratcliff. In this book, Trey shares his phenomenal HDR photographs as well as all the backstory on the adventurous circumstances of their origin. He also reveals the techniques he used to get the final shot. The breathtaking images gracing these pages and the author’s real-world advice for capturing and manipulating images will inspire you to create your own HDR magic. So Trey also includes his simple and straightforward tutorial that teaches you everything you need to know to make your own HDR photographs, whether you’re a beginner, amateur, or professional. A unique blend of practical and inspirational, this book features

a breathtaking collection of HDR photographs

engaging explanations of how the author achieved the image

expert tips for achieving stunning results (and avoiding common mistakes)

a foolproof HDR tutorial and software recommendations

Monday, December 14, 2009

I can't believe I forgot Topaz

Last week I had a post about processing a single frame as a HDR image. I totally forgot about Topaz. Now I want you to know that I use Topaz Adjust not only to create the HDR look but also to finish other images when necessary. It's a very easy program to use with a large and simple UI. There's a nice selections of presets and many easy to use adjustment sliders. You can find more information at their website and if you look around the web you can find discounts. Here are a few of those. stuck in customs and Rick Sammon. Above is a sample of what Topaz Adjust can do with little effort.

Sunday, December 13, 2009

Editor's Pick on HDR Spotting

This is really exciting. I have entered many pictures onto the HDR Spotting website, and most have been accepted for on-line publication. Today, a picture from Napal was accepted and picked as an editors choice. Click on the above image to see it in a larger size. Here's the link. Check out the rest of the site while you're there.

Thursday, December 10, 2009

You should look at Steve McCurry's work

If you are or are not familiar with Steve McCurry's work you should follow his blog.

His images are spectacular and inspiring. Look at the subject matter but take an extra minute to really look at the lighting and composition. He has the ability to see his subjects not just look at them.

I try to do that with my work. Can I teach myself how to do it or is it something you have or don't have? I don't know for sure. But when I'm out shooting, I try to look through the view finder and see my subject and visualize the final picture. It's hard work.

Monday, December 7, 2009

hdr from 1 image


I was asked recently if an hdr image can be produced from a single frame. The answer is yes. That's what I did with the attached picture. Click on it to see it in a larger size.

Well it's not a true hdr image, but close enough. First there are a few things to know. Always shoot RAW frames to capture as much information as you can. Low and medium contrast subjects work the best. If you are shooting in a high contrast setting it's best to use the more traditional 3 image method.

I use Photomatx Pro to tone map my RAW files. It's fast and easy. There are times when I only use a portion of that frame. I do this by opening up both the original RAW file and the Tone Mapped file in Photoshop and use layers and layer maskes to combine the images.
In the image above I introduced one of my favoite filters to the body of the rower. The Lighting Effects filter (Filter > Render > Lighting Effects) can be used to light your subject in the digital darkroom.

There is another method I use, but for this you will need "Color Efex Pro 3.0 Complete". A Photoshop plug in worth it's weight in gold. A NIK Software product, it will work magic on your image. I learned this from Moose Peterson. Open Color Efex Pro 3.0 Complete and go to Tonal Contrast. Move the Highlight, Midtone and Shadow sliders all the way to the right. It will look over done. Move the sliders back to the left until you get the effect you want. You can always lower the Opacity slider if it's still too much. Quick and very simple. You may want to combine both of these methods or even combine it with the original RAW file. Experiment. I do it all the time.


Thursday, December 3, 2009

Joe McNally's Neanderthal beauty video

For those of you not familiar with Joe McNally, take a look at his website and blog. He is one of the great shooters of our time. His work with National Geographic has been inspiring. Shortly after 9/11 my wife and I traveled into New York City to see a photo exhibit in Grand Central Station, "Faces of Ground Zero-Portraits of the Heroes of September 11". Our nerves and emotions still raw from that horrible event took us to this this place of compelling life size images of the true heroes of that day. I have followed his work since then.

On the lighted side, take a look at this video. The Neanderthal Beauty.

I'm sure it will make you smile.

Thursday, November 26, 2009

Happy Thanksgiving

I took this picture a few years ago when some wild turkeys came running through our backyard. This guy was particularly beautiful, and I think he knew it.

I just wanted to wish you all a Happy Thanksgiving. I know that I have a lot to be thankful for.

Tuesday, November 24, 2009

Photoshop User TV is back on the air


After a long wait, about 2 months, "Photoshop User TV" is back on the air. For those of you who don't know what that is, I'll explain. The National Association of Photoshop Professionals (NAPP) produces a web based TV style show every week. Scott Kelby, Matt Kloskowski and Dave Cross are the Photoshop Guys and your hosts. The revised show features a new set in addition to a new format. It's faster pace is packed with non-stop tips and tutorial and seems to work better. It is a great effort for the first show and I think it will get better as they settle into the new format.

In other news, Topaz has introduce ReMask 2. The original ReMask worked great but the interface was clumsy. That has all changed and I'm very happy with the new version. There is a special deal until Dec. 10, 2009. $30 off the $69.99 price with the code "magicbrush". Well worth it.

Saturday, November 21, 2009

Lots going on. . .

The posted picture is of Cathedral Rock in Sedona Az. I think it's the most photographed place in the whole Southwest. We hiked to the top of a nearby ridge to get this angle. The clouds really helped that day.

On to other things. On our trip out West I read David duChemin's book"Within The Frame" again. I can't recommend it enough. It's not a "How to" book it's a "Why" book. Well, he has just come out with a new book called "Visionmongers, making a life and living in photography". I'll let you know how I like it after I read it. He is a great writer.

Trey Ratcliff is having a book signing in New York on Dec. 14. I'm really looking forward to meeting him. His HDR images and tutorials have been an inspiration to me. "A World in HDR" will be out soon, so look for it if your interested in HDR.

In this months "Photoshop user Magazine" Scott Kelby has his 4th Annual GONZO HOLIDAY GEAR GUIDE. It's really cool if your looking for a holiday gift idea for the shooter in your life.

Have a good rest of the day. More pictures and news tomorrow.

Wednesday, November 18, 2009

Sedona is the best


We just spent a week in Sedona with friends and had a great time. Roger is a really good shooter and as you can imagine we spent a lot of time talking about photography and clicking our Canon cameras. The posted shot is of a small tool shed near Cathedral Rock. I'll try to post a picture of that tomorrow and I'm sure you'll recognize it.

Sunday, November 8, 2009


Trey Ratcliff has been a real inspiration to me and I'm sure to many people interested in HDR photography. His work is just outstanding and his blog is well worth following if you have any interest in HDR. Along with showing a new picture every day he has some great tutorials. I have been hoping for him to write a book and now he has. Trey has a special offer for "A WORLD IN HDR" on his blog that includes a signed print. What a great deal. I highly recommend you check it out.

Rick Sammon on Kelby Training


I subscribe to Kelby Training and I have taken many of their classes. Rick Sammon has a wonderful class called Exploring Digital Photography. This past week-end I watched it for the second time. It never gets old. Here you'll find many important tips for photographers of all levels along with the little details that make for better pictures. I'm sure I'll take the time to view it again in the future.

Tuesday, November 3, 2009

Unlock the background layer in the Layers Pallet


OK, so this will be short. Click on the Lock symbol and drag it down to the recyle icon at the bottom of the layers pallet. Done. I said it was going to be short.

Friday, October 30, 2009

A great place to learn hdr photography

I have written before about one of my all time favorite hdr shooters, Trey Ratcliff. Well he and a good friend have started this great new site called hdr spotting. If you have any interest in hdr photography it's the place to go. You can see what others are doing with their images. By studying the pictures submitted I get a better idea of what to look for in my own work. Some of mine have been accepted for display. It's a great incentive to do better work. Have a great week-end

Monday, October 26, 2009

A real time saver in the digital darkroom


This is one of my favorite keyboard shortcuts. I use it all the time when working on a large file with lots of layers. An example would be when I'm doing a website using SiteGrinder or creating a montage.
Here it is. Click on the "Move" tool (Ctrl V). Now hold down the Ctrl key and just click on any part of the image whose layer you want to find. That layer will become active in the Layers Pallet. Cool, yes. Try it, you'll love it.

Tuesday, October 20, 2009

David duChemin's new e book is out. "Drawing The Eye"

A few days ago I mentioned that David duChemin had a series of e books and that a third was going to be released soon. Well today is the day. Find it here. "Drawing The Eye" is a wonderful discussion about what draws the eye allowing the photographer to intentionally direct the viewers eye. "Understanding what draws the eye is key to creating compelling images to which we want others to feel drawn, images that tell the stories we want to with the best chance of communicating the things we want told."

I downloaded it today. It's a quick and very informative read. I know you'll like it.

Sunday, October 18, 2009

Placing a mat around your picture in photoshop


I've been asked how I place the mat around my pictures. It's easy.

Open your picture and duplicate the layer - Control + J
Press and hold Ctrl + Alt + C . This bring up the Canvas Size dialog box.
Make sure that the Relative box is checked, the Canvas Extension Color is set to White and the unit in the measure box reads inches. Now add 2 inches to the Height and Width. Click OK.

Next we want to add some additional space at the bottom of the picture. With the image remaining open, do the same thing over again but this time I want you to Click on the Top Arrow in the Anchor box. This will move the blank box to the top of the Anchor box. Leave the Width at "0" and add 1 inch to the Height. Click OK

With Layer 1 active press and hold the Ctrl key. Now click on the "Add a layer" icon at the bottom of the layer pallet. This will add a new layer below "Layer 1". Activate this new layer.

Press the "M" key to activate the Marquee tool. Make sure that you have the rectangular marquee tool selected. Click at the top LEFT and drag down the down to the lower RIGHT adding the amount of space you want for the mat.

Make sure your background is set to white in your color picker. Press the "D" key to return to the default setting and the "X" key if required to toggle the foreground and background colors. Press and hold the "Ctrl" key and press the Backspace key to fill the box you created with white. Press Ctrl + "D" to deselect

Double click on "Layer 2" to bring up the "Layer Styles" dialog box. Click on "Inner Glow" . Change the blend mode to Normal. Open the color picker dialog box by clicking on the yellow square and choose black for your new color. Click OK. Play with the Opacity and Size sliders to get the mat to your liking. Click OK . Finished.

I've set up the first part of the process as an action that takes me down to adding the marquee tool and filling it with white. Because each picture is a different size you'll have to do this each time. I've saved the "Layer style" I created as a "New Layer Style" making the entire process quick and easy.

Tuesday, October 13, 2009

Rick Sammon's "Top 10 digital photography tips" . . .and much more


Rick Sammon is a wonderful instructor. He brings an energy and wonderful style to his teachings. I found some of his videos on u tube that I know you'll enjoy. After that, I recommend his books and blog. He is really worth your time.

Sunday, October 11, 2009

Taking a second look


I've been working on a new website. I've been searching my files to find photographs to upload. Looking at them I realized that taking a second look at pictures was a part of my normal workflo. I bring my pictures into lightroom where I do some quick editing. I move into Photoshop to continue the process. My goal is to work on an image less that 5 minutes. I save it back into lightroom. Sometime later I bring it back onto my screen. In an instant I can see if it needs a tweak or not. Try it, I think it will help. It has for me.

Monday, October 5, 2009

David duChemin has some ebooks

David is one of my favorite writers/photographers. His book "Within The Frame" has helped me understand the WHY of photography. I can't recommend it enough. He now has come out with a series of e books.“Ten Ways to Improve Your Craft. None of Them Involve Buying Gear.” is the first. The second, "Ten More" builds on the first. I believe there will be one more. The price is $5.00 each. A great value for so much photographic incite and information. He even gives an exercise to go along with each chapter. Find them here.

Friday, October 2, 2009

Lighting Effects filter


One of my favorite filters in photoshop is the "Lighting Effects" filter. Filter>Render>Lighting Effects. I use the "Soft Omni" from the drop down menu. In the Preview box you can click and drag the center to position the light where you want it and click and drag the squares on the outside circle to enlarge or contract the area of light. Play with the sliders to get the final effect you want. After clicking OK you can reduce the opacity or add a mask and use the brush tool to adjust the effect. Clicking the "Light bulb" at the bottom of the Preview box allows you to add more lights.

Monday, September 28, 2009

Photowalk in NYC


We had a great day of eating and shooting in New York this past Sat. We walked along the recently opened "HighLine". It's worth a look if your going to be in the City. The HighLine is a park constructed on the old elevated rail structure. Above are 2 quick images and I'll try to have a few more in the next couple of days.

Friday, September 25, 2009

Photowalk in NYC

Tomorrow I'm going into New York City with my good friend and photo buddy Steve Dreyer. He's a good shooter and a really good guy. We missed this years Photowalk with the NAPP group for different reasons so we're doing it on our own. I'll share some stuff next week. Have a great week-end

Tuesday, September 22, 2009

HDR tutorial in the works


I've starting working on my first tutorial to post on this blog. I enjoy shooting and processing HDR pictures and thought I would share some of the information I've learned. It may take a while to put together but in the end I hope it will be informative.

Monday, September 21, 2009

Early in the morning

Very early some mornings it pays to stop by the lake in town. The US Rowing Team and the Princeton University Rowing Team use the lake to train. When the light is right and I get a picture like this, it makes my day.

Saturday, September 19, 2009

Using textures with photoshop


In the past week I've been experimenting with textures in my work flow. I must say that it's lots of fun and certainly adds to the creative process. I found this wonderful site on-line that has thousands of high quality textures available for down load. Many of which are free and then for a relatively small yearly fee you have access to their entire library. They also have tutorials that are very interesting. Here's the link. I think you should try it. If you do, I know you'll enjoy it.

Monday, September 14, 2009

Photoshop "Keyboard shortcuts"


There are more keyboard shortcuts than anyone can remember, at least than I can. But there are some that really save a lot of time and are simple to use. Not only that but they make me feel like I really have learned something and have moved from beginner to another level. Try some of these and see for yourself. I use a PC so Mac users will have to search them out. If you go on-line you'll find them all.

Ctrl + J - Duplicates a layer. I use this on every photograph
Ctrl + Z - Undo/Redo the last action
Ctrl + Alt + Z - Step back (history)
B - Brush tool
[ - Decrease brush size
] - Increase brush size
Ctrl + 0 - Fit to screen
Ctrl + Space bar - Click and drag to zoom in
Space bar - Hold down and drag to move around the image

This one I learned from a Vincent Versace video. He calls it "the move". It comes in handy when you don't want to flatten your image. It gives you a merged version of all the layers below. Activate the top layer and do the following.

Ctrl + Alt + Shift + E - Stamp visible

Thursday, September 10, 2009


We were on Cape Cod for a few days staying at a friends place right near the water. As we drove down the long driveway I saw some activity at the top of this nesting poll. I was able to get my 70mm-200mm lens on the camera in time to catch this shot. I processed it two ways. In the top image I added some texture. I think it really works well. Click on the images to make them larger. Hope you like them.

Wednesday, September 2, 2009

I love listening to Vincent Versace

Tonight I was catching up on the blogs and websites I follow. I don't stop by Vincent Versace' site aften but when I do I'm always moved by something. Tonight it was a discussion between Derrick Story of O"Reilly' digitalmedia and Vincent at Photoshop World Orlando. They discuss some of the larger philosophical questions about the art of photography. Vincent is always animated and interesting. I'm sure you'll get something out of it. Let me know if you do. Look at the video here

Tuesday, August 25, 2009

Join NAPP

If you're just beginning to learn Photoshop CS4 and/or Lightroom, or you have been working with these program making little headway, the best thing you will ever do is to join NAPP. The National Association of Photoshop Professionals is by far the best place to learn pretty much everything you'll need to know about the digital darkroom and so much more. Here's the link I tried learning from books and struggled on my own for the longest time. They offer so much information in the way of a weekly TV (computer) show, tutorials, forums, help center, discounts and a magazine. All this and more for $99. I'm telling you, it's a must if you want to learn fast and easy.

The histogram debate

For the past few days David duChemin has had some very interesting thoughts on this whole "should I worry about the histogram at all, somewhat, or is it the holly grail of photography . I'm still trying to make up my mind but he offers some compelling reasons for understanding the histogram but not relying on it to make wonderful images. He's suggesting to shoot in AV mode and use the exposure compensation dial to move the histogram as for to the right (highlights) as you can without bumping it against the edge. Here's the link. http://www.pixelatedimage.com/blog/. He explains it much better than I. In Scott Kelby's "The Digital Photography Book" Volume #3 he writes that he doesn't use the histogram at all but instead uses the cameras highlight warning ( blinkies), then use exposure compensation to darken the image and bring back the highlight detail. My suggestion would be to read all you can about the subject, experiment and make your own decisions. That's what I'm doing.

Monday, August 24, 2009

Photoshop TV

Here is a great way to stay on top of what's going on in the world of Photoshop. It's an entertaining show featuring the Photoshop guys from NAPP. Scott Kelby, Matt Kloskowski, and Dave Cross offer tutorials, tips and interviews that will make your time working in Photoshop more productive.
http://www.photoshopusertv.com/

Sunday, August 23, 2009

The great photographers and teachers I follow

Today I added a list of the blogs and sites I follow almost on a daily basis. These photographer/teachers have so much information to impart that its almost impossible to grasp it all at one sitting. I suggest you follow their blogs and learn from them. I feel that if I come away with just one new idea, the time is well spent.

Saturday, August 22, 2009

Day one

I think I have the page layout looking the way I want, for now at least. I'm sure I'll be changing it as I learn more about blogspot. Why am I writing a blog. I'm not sure but my first thought is to help me understand why I do some of the things I do and at the same time help others with simple tips. I'm not a writer so I hope you will not hold that against me.